Mastering State Management in Blazor: A Comprehensive Guide
Table of Contents
As developers explore the evolving world of web technologies, Microsoft’s Blazor framework has gained substantial attention, primarily for allowing us to write client-side web UI with C# instead of JavaScript. In this article, we’re going to dive deep into one of Blazor’s core concepts: state management.
This is a more advanced article and should supplement my blog post https://kaushikroychowdhury.com/blog/state-management-in-blazor-web-assembly-with-asp-net-6-0/
What is State Management?
State management refers to the method by which a web application maintains, manipulates, and tracks changes to the application state during its lifecycle. Application state can be anything that the application needs to remember between requests, like user input, server responses, cached data, and more.
In a Blazor app, state management becomes critical because Blazor apps can run client-side, where maintaining state across sessions can be a bit tricky.
State Management Approaches in Blazor
There are several methods for managing state in Blazor applications, including:
- Component State: Stored within a component, it only lasts for the lifespan of the component.
- Service State: Stored in a service registered with the dependency injection container. The state exists for the lifespan of the service.
- Application State: A global state that exists for the duration of the user’s interaction with the app.
- Persisted State: Stored outside of the app, such as in local storage, session storage, or in a database.
Let’s examine these approaches in more detail, using C# code examples.
Component State
In the simplest scenarios, we can store state within components using standard .NET properties. This state is only available as long as the component is in memory, which ends when the user navigates away from the component. Here’s a simple counter example:
@page "/counter"

<h3>Counter</h3>

<p>Current count: @currentCount</p>

<button class="btn btn-primary" @onclick="IncrementCount">Click me</button>

@code {
    private int currentCount = 0;

    private void IncrementCount()
    {
        currentCount++;
    }
}
Now let’s see it in action in an actual Blazor Project as below:
I have created a Blazor Web Assembly project (Empty) template in Visual Studio 2022 Community Edition. I named the project StateManagement. Next, I added a Razor component (. razor file) in the Pages folder with the name ComponentState. (See Fig 1) and added the code as above. (Fig 1)

In this code, we define a component that is accessible at the route “/counter”. The component’s UI consists of a title, a paragraph displaying the current count, and a button that increments the count.
currentCount is the state in this component. We initialize it to 0 and increment it by one every time the “Click me” button is clicked. The @onclick directive is a built-in Blazor event callback that wires up the button’s click event to the IncrementCount method.
Every time the state changes (i.e., every time IncrementCount is called), Blazor automatically re-renders the component, updating the displayed count.
On Running the project and browsing to http://localhost:5085/counter, I get the following screenshot:
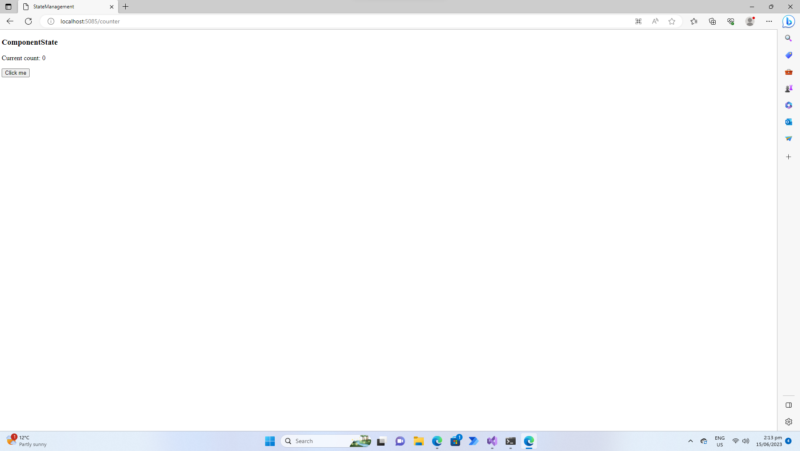
On clicking the button, I get the counter to increment it’s value like below:

Service State
In Blazor, services are often used to share state across components. We use ASP.NET Core’s built-in dependency injection framework to register and retrieve services. Let’s modify our counter to use a service:
First, let me create a class named CounterState in the project root with code as follows (Fig 2)
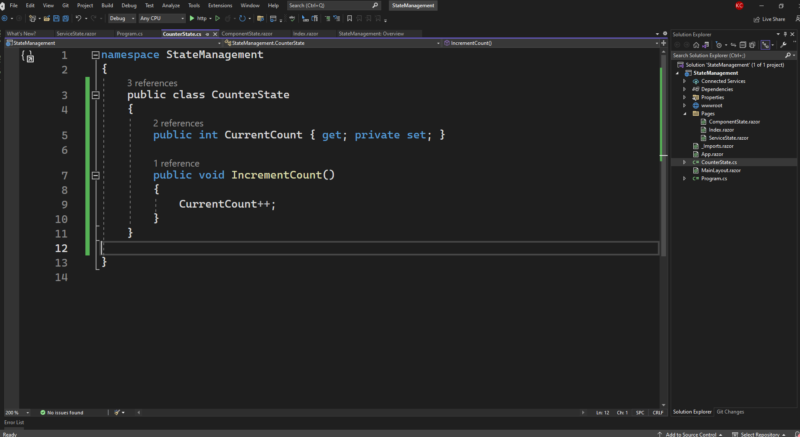
Then in the Program.cs file, added the service to the DI container:

Now we can inject this service into any component:
So I created a component called ServiceState within the Pages folder as per Fig 3

Now let me run the project after commenting the @page directive in ComponentState component that I demonstrated earlier. This is required as two razor components can’t have the same @page directive. (In this case “/counter”) (Fig 4). Alternately, I could also create a @page directive for ServiceState component to point to another route, in which case no commenting would be required for ComponentState component.

With these changes, let’s demonstrate StateService in action by running the project with clicking either F5 or (Ctrl+F5) buttons.
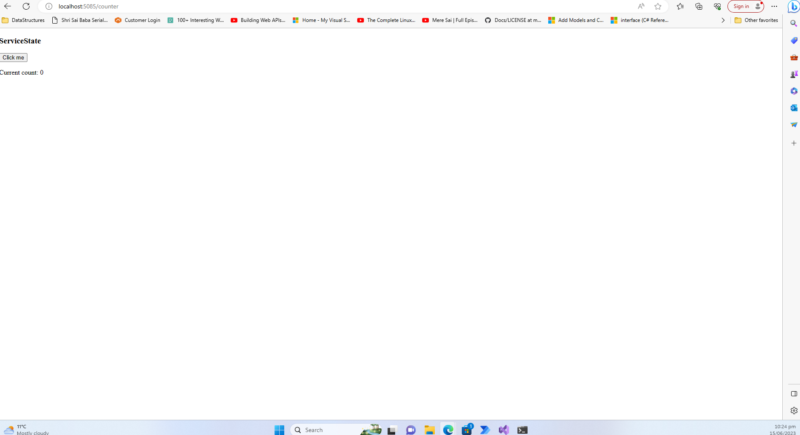
As previously demonstrated (for ComponentState), repeatedly clicking the button increments the counter as below

Application State
When sharing state across the whole application, we often use a store pattern.
Application state represents data that your application needs to maintain over time and across user interactions. This data is stored in a central location, often a “store”, that can be accessed from any component in your application.
The store typically exposes methods for changing the state and an event that is raised whenever the state changes. Components can subscribe to this event to be notified of state changes, which allows them to re-render and reflect the updated state in the UI.
The concept is similar to libraries like Redux in the JavaScript world. This is a bit more advanced, but it’s a robust way of managing complex state.
Let’s create a basic store for our counter by creating a CounterStore class at the root of the StateManagement Project (Fig 5):

We now register the CounterStore in our Program class as below: (Fig 6)

And in our component, we subscribe to the OnChange event to react to state changes in the OnInitialized() lifecycle method (Fig 7):

Event Raising and Subscription
When dealing with application state, an event-driven approach is often used. This means that when a state change happens (an “event”), any interested party (a “subscriber”) gets notified.
Let’s look at our CounterStore example (as below and also in Fig :
public class CounterStore
{
public int Count { get; private set; }
public event Action OnChange;

public void IncrementCount()
{
    Count++;
    NotifyStateChanged();
}

private void NotifyStateChanged() => OnChange?.Invoke();
}
In this code, OnChange is an event that gets raised whenever the state (in this case, Count) changes. NotifyStateChanged is a helper method that raises the OnChange event. It checks if the event has any subscribers (OnChange?), and if it does, it invokes them (Invoke()).
Any component that wants to react to state changes can subscribe to the OnChange event:
protected override void OnInitialized()
{
    count = CounterStore.Count;
    CounterStore.OnChange += UpdateCount;
}
In this code, UpdateCount is a method that gets called whenever the OnChange event is raised. We subscribe to the event in the OnInitialized lifecycle method.
Blazor Lifecycle Methods
Lifecycle methods in Blazor give you the opportunity to execute code at specific times in a component’s life cycle, such as when it’s created, when parameters are updated, or when it’s about to be rendered.
In our example, we use the OnInitialized method to subscribe to the OnChange event. This method is called once, after the component is first initialized, but before it’s rendered.
When the component is disposed of, it’s important to unsubscribe from the OnChange event to prevent memory leaks:
public void Dispose()
{
    CounterStore.OnChange -= UpdateCount;
}
Reacting to State Changes
Once a component has subscribed to a store’s event, it can react to state changes. In our example, the UpdateCount method is called every time the OnChange event is raised:
void UpdateCount()
{
    count = CounterStore.Count;
    StateHasChanged();
}
In this method, we update the count variable to reflect the new state, and then call StateHasChanged to tell Blazor that it needs to re-render the component.
This whole process of maintaining a central application state, notifying subscribers of state changes, and reacting to these changes is a fundamental pattern in modern UI development, not just in Blazor, but also in other frameworks like React and Vue.js. It allows you to build complex, interactive applications where different components can stay in sync and react to shared state changes.
Now to see the ApplicationState in action, let’s run the application (Ctrl + F5) and browse to “/counter” as below (Fig 8):
The counter value increases with every clicking of the button.

Persisted State
Lastly, let’s take Persisted State that involves storing it (state) in a location that survives page refreshes and even browser restarts, such as the local storage or session storage. It can also be stored on a remote server or database. This process involves serializing the state, sending it to the storage location, and then deserializing it when it needs to be accessed again.
Let’s use the Blazored.LocalStorage NuGet package to persist our counter’s state in local storage. (Fig 8)

First register the service in Program.cs file :
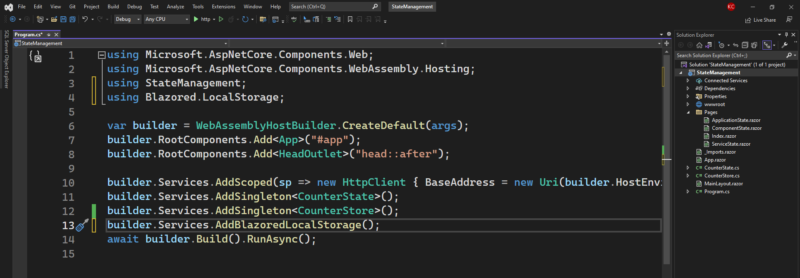
To keep all the state management methods distict, let’s create another component named PersistedState as follows:

Now change the code in the PersistedState.razor to below
@page "/counter"
@inject CounterStore CounterStore
@inject Blazored.LocalStorage.ILocalStorageService LocalStorage
<h3>PersistedState</h3>

<button @onclick="IncrementCount">Click me</button>
<p>Current count: @count</p>

@code {
    private int count;

    protected override async Task OnInitializedAsync()
    {
        count = await LocalStorage.GetItemAsync<int>("count");
        CounterStore.OnChange += UpdateCount;
    }

    void IncrementCount()
    {
        CounterStore.IncrementCount();
    }

    async void UpdateCount()
    {
        count = CounterStore.Count;
        await LocalStorage.SetItemAsync("count", count);
        StateHasChanged();
    }

    public void Dispose()
    {
        CounterStore.OnChange -= UpdateCount;
    }
}
The above code retrieves the count from local storage when the component initializes and updates the local storage whenever the count changes.
Let’s see all in action by clicking the light green arrow(Ctrl + F5) button combination and again browsing to “/counter”. When you click the “Click me” button repeatedly, the counter always updates its value.

What is the local storage used for Persisted State earlier?
Local storage is a web storage object that stores data with no expiration date. This data remains intact even if the user closes the browser window or turns off their system. It’s ideal for persisting data between sessions or to make an application available offline.
Local storage is a key-value store, meaning you store data as a pair of keys and values. Both keys and values are always strings.
The “Blazored.LocalStorage” NuGet package provides a convenient way to use local storage in Blazor applications. It provides asynchronous methods for reading and writing data in local storage, which makes it compatible with Blazor’s async data flow.
In our example, we use the “LocalStorage” service to persist the counter’s state (Fig 11):

In the OnInitializedAsync lifecycle method, we retrieve the count from local storage using the GetItemAsync method. If there’s no value associated with the “count” key, this method returns the default value for the type (0 in the case of int).
Every time the count changes (in the UpdateCount method), we update the value in local storage using the SetItemAsync method.
It’s important to note that while local storage is convenient and can be very useful, it has several limitations:
- Limited Storage: Browsers typically allow up to 5MB of data per origin.
- Performance: Reading and writing to local storage is slower than memory, so it should be used judiciously.
- Security: Local storage is accessible through JavaScript, which makes it susceptible to cross-site scripting (XSS) attacks. Therefore, you should never store sensitive information in local storage.
Despite these limitations, local storage is a powerful tool for persisting non-sensitive data across sessions in a Blazor application.
Summary
Blazor offers several strategies for state management, each suited to different scenarios. Component and service state is ideal for managing local and shared state, while application state (via a store) is useful for more complex scenarios. Persisted state allows you to maintain state across sessions.
Understanding these patterns will help you build more robust and efficient Blazor applications. Remember, the right state management approach largely depends on the nature and requirements of your specific application. It’s always a good practice to choose the simplest approach that fulfills your needs.
Feedback
In this guide, we’ve delved into the topic of Blazor state management, discussing various approaches including managing state locally, via a service, or using an application store. Each method has its own strengths and challenges, and the best choice often depends on the complexity of your application and the specific requirements of your project.
However, as much as we’ve covered, this topic is vast and there’s always more to learn. This is where the wonderful Blazor community comes in.
Can you share your thoughts on the differences between managing state locally, via a service, or with an application store? Which approach do you prefer and why? Your insights could be incredibly beneficial to other readers, and we’re all eager to learn from your experience. Feel free to leave a comment below.
Remember, every development journey is unique, and there’s no one-size-fits-all solution. The magic lies in sharing our knowledge and growing together.
Thanks for reading, and happy coding!
Follow Me Here




One Response
This article really helped me understand and differentiate between the different types of storage.
the one fix I had for using blazor server rendering and the Application state wast to invoke StateHasChanged() with the invokeasync method InvokeAsync(StateHasChanged);