Using OpenAI API to Generate Text in a Blazor WASM
Table of Contents
Step 1: Set up a new Blazor WebAssembly Project
Create the Blazor WebAssembly App: Open your terminal or command prompt and run the following command to create a new Blazor WebAssembly app:
dotnet new blazorwasm -o OpenAIBlazorApp

This will create a new Blazor WebAssembly application in a folder named OpenAIBlazorApp.
Navigate to the project directory:

Step 2: Install HttpClient and Add Services
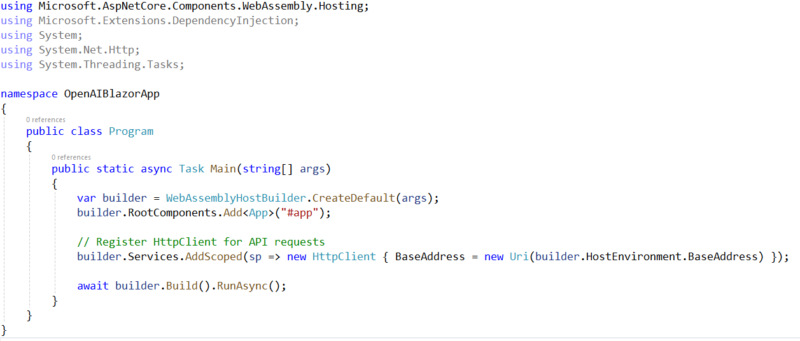
The application will need to make HTTP requests to the OpenAI API. Ensure you have HttpClient set up in your Program.cs to call external APIs.
Open the project in Visual Studio 2022
Edit the Program file to appear as below:
Step 3: Create the API Service to Call OpenAI
- Create a folder called
Servicesin your project. - Add a new class
OpenAIService.csinside theServicesfolder:

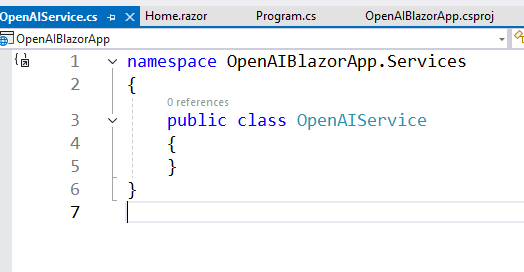
Write the following code in the OpenAIService class
using System.Net.Http;
using System.Text;
using System.Threading.Tasks;
using System.Text.Json;

namespace OpenAIBlazorApp.Services
{
    public class OpenAIService
    {
        private readonly HttpClient _httpClient;
        private readonly string _apiKey = "<YOUR-API-KEY>"; // Add your OpenAI API key here

        public OpenAIService(HttpClient httpClient)
        {
            _httpClient = httpClient;
        }

        public async Task<string> GenerateTextAsync(string prompt)
        {
            // API endpoint for text completion (GPT-3 or GPT-4)
            var url = "https://api.openai.com/v1/completions";

            var requestData = new
            {
                model = "text-davinci-003", // You can use other models too
                prompt = prompt,
                max_tokens = 150,
                temperature = 0.7
            };

            var jsonContent = JsonSerializer.Serialize(requestData);
            var content = new StringContent(jsonContent, Encoding.UTF8, "application/json");

            // Add the Authorization header with the API key
            content.Headers.Add("Authorization", $"Bearer {_apiKey}");

            var response = await _httpClient.PostAsync(url, content);

            if (response.IsSuccessStatusCode)
            {
                var responseContent = await response.Content.ReadAsStringAsync();
                var completion = JsonSerializer.Deserialize<JsonElement>(responseContent);
                return completion.GetProperty("choices")[0].GetProperty("text").GetString();
            }
            else
            {
                return "Error: Unable to generate text.";
            }
        }
    }
}
Step 4: Register the Service in Program.cs
builder.Services.AddScoped();
Step 5: Create the Blazor UI for Interaction
- Open the
Pages/Home.razorfile and replace its contents with the following code to create a UI that allows the user to enter a prompt and display the generated response:
@page "/"
@inject OpenAIService OpenAIService

<h3>Generate Text using OpenAI</h3>

<div>
    <label for="promptInput">Enter your prompt:</label>
    <textarea id="promptInput" @bind="prompt" rows="4" cols="50"></textarea>
</div>
<br />

<button @onclick="GenerateText" class="btn btn-primary">Generate</button>

<div>
    <h4>Response:</h4>
    <p>@generatedText</p>
</div>

@code {
    private string prompt = string.Empty;
    private string generatedText = string.Empty;

    private async Task GenerateText()
    {
        if (string.IsNullOrWhiteSpace(prompt))
        {
            generatedText = "Please enter a prompt.";
            return;
        }

        generatedText = "Generating...";

        try
        {
            generatedText = await OpenAIService.GenerateTextAsync(prompt);
        }
        catch
        {
            generatedText = "An error occurred while contacting the API.";
        }
    }
}
Key Points:
promptis bound to thetextareainput.- When the “Generate” button is clicked, the
GenerateTextmethod is called to invoke theOpenAIServiceand display the generated text. generatedTextis displayed in the UI once the response is received.
Step 6: Run the Application
- Build and run the application:
- In Visual Studio, click “Run” or press
Ctrl + F5.
- In Visual Studio, click “Run” or press
Step 7: Test the Application
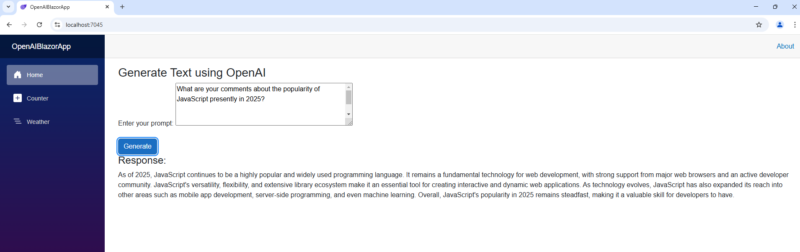
- Enter a prompt like “Explain the concept of closures in JavaScript” in the textarea.
- Click Generate.
- After a few seconds, you should see the response from the OpenAI API, explaining the concept of closures.